Clipping path photo editing is an essential art that’s become the backbone of many industries reliant on visuals. Whether you’re a photographer, e-commerce manager, or digital marketer, understanding the intricacies of this photo retouching technique can transform your images into sharp, eye-catching masterpieces. This comprehensive guide will not only unfold the meaning and significance of clipping path editing but also equip you with the skills to create stunning and professional visuals on your own.
Understanding Clipping Path Editing
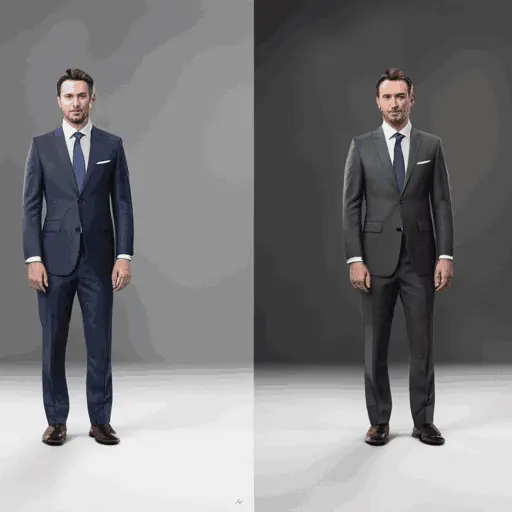
Clipping path is a digital photo editing technique widely used to cut out specific parts of an image. With precision and skill, the backgrounds of photographs can be removed, edited, or replaced, allowing objects to be placed on a new canvas or seamlessly integrated into various designs. Think of it as wielding digital scissors, but with the precision of a surgeon, ensuring that every cut and contour is flawlessly recreated.
The Core Benefits of Clipping Path Photo Editing
- Forefront of Branding: It allows you to highlight your products or subjects without visual distractions, which is crucial in establishing a recognizable brand identity.
- Enhancing Visual Appeal: By isolating objects and adjusting backgrounds, you can significantly enhance the overall visual appeal of your assets, driving more engagement with your audience.
- Flexible Integration: Clipped images are versatile and can be adapted to fit a myriad of design layouts and styles, giving you the flexibility to repurpose your visuals across various platforms.
- High Quality Expectation: It ensures every detail in your image has the appropriate attention, necessary for high-quality presentations and print layouts.
Professional Techniques in Clipping Path Editing
Now, let’s explore the different techniques and tools at your disposal for mastering the art of clipping path editing.
Pixel Perfection with Pen Tool
The Pen Tool in Adobe Photoshop is the darling of professional image editors. Its precision allows you to carefully draw paths around the edges of your subject, ensuring the most accurate cut.
Here are the key steps to using the Pen Tool effectively:
- Starting a Path: Activate the Pen Tool and click around the object to set anchor points that define the path.
- Adjusting Curves: Click and drag to create curves, keeping an eye on how the handles control the shape and direction.
- Closing a Path: To close the path, click on the original anchor point, at which point your path will become a selection.
- Fine-tuning the Selection: With the path still selected, refine the selection by feathering the edges to achieve a natural blend.
Magic of Layer Masking
Layer masking is a non-destructive technique where you can hide parts of an image or layer, preserving the original image non-destructively. It gives you the ability to adjust and readjust your clipping without altering the original photo.
The process can be summarized as follows:
- Create a Rough Selection: Use selection tools like Lasso or Magic Wand to make a rough selection of the subject.
- Add a Mask: With your selection in place, click on the Layer Mask icon to create a mask of the selected area on the layer.
- Refine the Mask: Select the mask and use a soft brush to paint on the areas of your subject you wish to hide or reveal, adjusting opacity and brush hardness as needed.
Other Clipping Path Applications
While Adobe Photoshop is the go-to for many, there are other software and techniques worth considering, especially for specific use cases.
- Illustrator’s Clipping Path: Adobe Illustrator can create clipping paths directly with shapes and paths, making it a powerful tool for vector-based images.
- Background Eraser Tool: This tool can be helpful for images with consistent backgrounds, automating the process for faster editing.
- Complex Background Techniques: For busy or complex backgrounds that don’t lend themselves well to automatic tools, the layer-by-layer approach with masks and manual adjustments may be necessary.
Advanced Applications of Clipping Path Editing
One of the golden rules of great photo editing is knowing when to use the basic techniques and when to apply more advanced methods.
Colour Replacement and Adjustment
Clipped images offer more control over color replacements or adjustments. By editing the clipped layers separately, you can fine-tune the colors of your subject without affecting the new background or vice versa.
Here’s how you can do it:
- Selective Coloring: Use the Hue/Saturation adjustment layer or tool and select the color you want to adjust. Manipulate the sliders for the desired effect.
- Colour Replacement: With a clipped layer, use the Brush Tool to paint in new colors, either by hand or using blending modes to keep the colors vibrant and natural.
Adding Creative Effects with Clipping Paths
Clipped images can be more than just crisp product shots. By adding creative effects, you can turn a simple photo into a captivating visual story.
Consider these advanced techniques:
- Depth of Field Manipulation: Simulate the depth of field effect by blurring the background layer, giving the illusion of focus on the clipped object.
- Light and Shadow Adjustments: Paint in highlights and shadows to match the lighting of the new scene, adding realism and depth.
- Texture Blending: Use the Overlay or Soft Light blending modes to integrate textures into the clipped object, giving it a unique and interesting look.
Troubleshooting Common Clipping Path Issues
Despite your best efforts, clipping path editing can sometimes be tricky, and certain issues may arise. But fret not, most of these common problems have simple solutions.
Jagged Edges and Overly Smooth Cuts
Jagged edges can happen if the path is too close to the object or if there are sudden angle changes. Conversely, overly smooth cuts can make your edges look unnaturally straight. The key is to find the right balance.
To fix jagged edges, try:
- Contracting the Selection: After creating the path, go to Select > Modify > Contract and choose a pixel value that brings the selection in slightly.
For overly smooth edges:
- Manually Add Detail: Use the Brush Tool to add or remove anchor points, adding detail to areas that should have more natural curves.
Problems with Transparency and Layer Order
The transparency within a clipping path can sometimes lead to strange effects or require careful layer management to look right.
Solutions to transparency issues include:
- Layer Reordering: Sometimes, shifting the order of your layers can make a difference. For example, putting the object above a solid background can prevent bleed-through.
To manage transparency:
- Use a Fill Layer: Create a layer below your clipped object and fill it with white to eliminate any transparency, giving your image a clean, consistent look.
Real-World Applications of Clipping Path Photo Editing
Clipping path editing has a myriad of practical applications that extend across various industries.
E-Commerce and Product Photography
In the e-commerce world, quality photos could be the difference between a sale and a lost customer. By removing cluttered backgrounds, creating uniform image sizes, and showcasing your products at their best, clipping path editing is a game-changer.
Key Considerations for E-commerce:
- Consistent Style and Look: Ensure all your product images have a consistent white balance, shadow intensity, and angle for a polished online store.
- Detail Focus: Zoom in on important features by cropping and adjusting the details of your clipped product, highlighting what sets it apart.
- Scale and Proportion: Manipulate images with clipping path techniques to abide by the golden rule of e-commerce: show size and scale effectively.
Marketing and Advertising Design
Clipped images often star in marketing materials where the visual message is paramount. They allow for creative freedom while maintaining the focus on the product or theme at hand.
Clipping Path Tips for Marketers:
- Seasonal Campaigns: Use clipping path editing to switch up backgrounds for various holiday or seasonal marketing campaigns.
- Promotions and Discounts: An eye-catching image with a clipped-to-new-background product can make all the difference in a promotional email or social media post.
- Print and Media: Leverage the high-quality potential of clipped images for print materials like brochures, magazines, and billboards.
Conclusion: The Power of Precision in Clipping Path Photo Editing
Clipping path photo editing is a versatile and powerful tool in the world of photography and design. It enables you to create visually captivating images that resonate with your audience and convey your message effectively. The techniques and applications we’ve covered are just the beginning of what you can achieve with this art form. With practice and a keen eye for detail, you’ll be producing professional-grade cutouts and retouches in no time.
Remember, every touch of the brush, every anchor point you place, and every color you adjust brings your vision to life. Whether you’re aiming to sell more products, make your mark in marketing, or simply enhance the beauty of your visual content, clipping path photo editing can be the difference that makes your images stand out in a crowded digital landscape.
Now, harness the power of precision in clipping path editing, and watch as your digital assets transform from snapshots into icons of creativity and quality.